You can set up your mini spy IP camera in three simple steps. First, unbox and place the camera strategically. Next, connect to your Wi-Fi by accessing the settings menu and entering your network details. Finally, configure the camera settings by adjusting resolution, enabling motion detection, sound recording, and night vision mode. Mastering these steps will help you get your camera up and running in no time.
Unboxing and Initial Setup
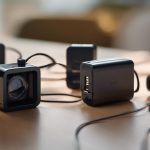
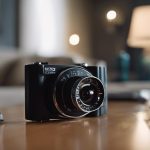
Upon receiving your mini spy IP camera, carefully unbox it and begin the initial setup process by following these steps. Start by unboxing the items included in the package, making sure that all components are present. You should find the mini spy camera, a USB cable for charging, a user manual, and any additional accessories.
Next, strategically place the camera in the desired location. Consider areas with a wide viewing angle and minimal obstructions for best surveillance coverage. Common placements include bookshelves, window sills, or hidden among everyday items. Ensure the camera is discreetly positioned for effective monitoring without drawing attention.
Take your time to familiarize yourself with the camera's features and functionalities before proceeding to the setup. This will help you navigate the installation process smoothly.
Connecting to Wi-Fi Network
To connect your mini spy IP camera to your Wi-Fi network, access the camera's settings menu and locate the Wi-Fi network setup option. Once there, select your network from the list of available options and enter the Wi-Fi password to establish the connection. It's important to make sure that the camera is within the range of your Wi-Fi signal for a stable connection.
If you encounter any troubleshooting connection issues during this process, double-check the accuracy of the entered Wi-Fi password and verify that your network is functioning correctly. Sometimes, simply restarting your router can resolve connectivity problems.
Securing network access is vital to protect your camera from unauthorized access. Make sure to use a strong, unique password for your Wi-Fi network and consider enabling additional security measures such as WPA2 encryption. These steps will help safeguard your camera feed from potential breaches and unauthorized viewing.
Configuring Camera Settings

Begin by accessing the camera's settings menu to configure various parameters such as resolution, recording mode, and motion detection sensitivity.
Adjust the resolution settings based on your preference for image quality versus storage space. Higher resolutions provide clearer images but require more storage.
Enable motion detection to trigger recording when movement is detected, conserving storage space and ensuring you capture relevant footage.
To enhance surveillance capabilities, consider enabling sound recording to capture audio along with video. This can be essential in certain situations.
Additionally, activate night vision mode if you plan to monitor low-light areas. Night vision uses infrared LEDs to illuminate the scene, allowing the camera to capture footage even in complete darkness.
Remember to fine-tune the motion detection sensitivity to avoid false alarms triggered by irrelevant movements like tree branches swaying in the wind.
Conclusion
To sum up, setting up a mini spy IP camera is a straightforward process that can be completed in just three easy steps. By following the unboxing and initial setup instructions, connecting the camera to your Wi-Fi network, and configuring the camera settings, you can have your camera up and running in no time.
With this simple guide, you can easily enhance your security and surveillance measures with a compact and powerful mini spy IP camera.