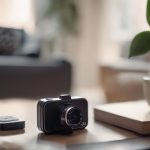

A spy pen camera can combine ordinary pen design with basic video, photo, audio, and file-transfer functions. Because controls and features vary between models, the supplied user manual PDF should remain your main reference. Use the guide below to understand the usual setup process, then confirm each function against your specific device.
1. Identify the controls and connections
Before recording anything, inspect the camera and locate its main components. Most models include a small lens, a power or multifunction button, a USB connection, and sometimes a separate reset opening. Some devices also include indicator lights, a microSD card slot, or additional buttons for switching between modes.
- Camera lens: Keep it clean and make sure it is not covered by a protective film.
- USB port: Usually used for charging and transferring recorded files.
- Power button: May turn the device on or off or activate a recording mode with a short or long press.
- Reset button: Intended for recovering from an unresponsive device, not for routine shutdown.
- Memory card slot: If included, check the manual for the supported card type and capacity.
Take a few minutes to learn the button sequence before using the camera. Small indicator lights or vibration alerts may signal power, recording, charging, or an error.
2. Charge the camera and make a test recording
Charge the device fully according to the instructions in the manual. Then make a short test recording in a well-lit location. This confirms that the camera starts correctly, the lens is positioned as expected, and the file can be saved.
Connect the camera to a computer using the supplied or compatible USB cable when you need to transfer files. Depending on the model, the device may appear as removable storage, or you may need to remove its memory card. Copy a test file to your computer and play it back before relying on the camera for longer recordings.
Use the camera only where recording is lawful and appropriate. Inform people when required, respect privacy, and never use a concealed recording device to harass, threaten, or secretly capture private conversations.
3. Explore recording modes and settings
Once the basic controls are familiar, review the available settings. The exact menu and button combinations differ by model, but a user manual PDF commonly explains options such as:
- Video resolution and, where available, frame-rate choices
- Still-image capture
- Audio recording
- Date and time stamps
- Motion detection
- Loop recording or file segmentation
Higher video quality can produce clearer footage but may use more storage space. Lower settings may be useful for longer recording sessions or limited memory. Set the date and time before your first important recording so that file information is easier to organize. If the camera offers motion detection, test it in a controlled setting to learn how movement triggers recording and how long the device remains active.
4. Organize and review your files
After recording, connect the camera to a computer and copy the files into clearly named folders. A simple structure based on date, location, or project can make later searches easier. Avoid editing the original files immediately; keep an untouched backup and work from duplicate copies when necessary.
Use the camera’s playback controls, if available, to pause, rewind, or review footage directly on the device. Computer playback is generally more convenient for checking image quality and audio. Watch for problems such as a blocked lens, missing sound, incorrect timestamps, or files that stop earlier than expected.
5. Troubleshoot before extended use
Testing the camera in advance is the best way to find problems. If it will not turn on, charge it again and confirm that the power button is being pressed for the duration specified in the manual. If it remains unresponsive, use the reset procedure described by the manufacturer.
- Blurry footage: Clean the lens gently and check whether a protective covering remains in place.
- No saved recording: Confirm that the memory card is inserted correctly and has available space.
- Short recording time: Check the battery level, recording resolution, and whether motion or loop settings are active.
- Unresponsive buttons: Inspect the controls for dirt or obstruction and avoid forcing them.
- File-transfer problems: Try another USB port or cable and follow the manual’s connection instructions.
Do not open the casing or attempt a repair unless the documentation specifically permits it. When a problem continues after charging, resetting, and checking storage, consult the model-specific instructions rather than guessing at button combinations.
Build a reliable operating routine
A short pre-use checklist can prevent most avoidable errors: charge the battery, check available storage, clean the lens, confirm the date and time, select the required recording mode, and make a brief test. With those habits in place, the manual becomes a useful reference for model-specific features rather than something you need to rediscover after a problem occurs.