
Home security does not have to involve complicated wiring, expensive installation, or a long-term monitoring contract. Easy-to-install home security systems give renters, homeowners, and small property managers a practical way to monitor entry points, receive alerts, and record activity. Most setups can begin with a small number of devices and expand as your needs become clearer.
Why choose a DIY security system?
A do-it-yourself system can reduce installation costs and give you more control over where equipment is placed. Wireless sensors and cameras are also useful when you move frequently or do not want to drill into walls. Because you install the equipment yourself, you become familiar with the system’s controls, alert settings, storage options, and power requirements.
DIY security is especially suitable for:
- Renters who need removable equipment
- Homeowners protecting doors, windows, garages, or outdoor areas
- Small properties that do not require a complex commercial installation
- People who want to avoid or limit recurring monitoring fees
- Users who prefer to add cameras and sensors gradually
Common types of easy-install systems
An all-in-one security kit usually includes a central hub, entry sensors, motion detection, and sometimes one or more cameras. These packages are convenient when you want a basic system with compatible components and a straightforward setup process.
Modular systems provide greater flexibility. You can start with a door sensor and indoor camera, then add window sensors, outdoor cameras, a siren, or additional motion detectors later. This approach may be more economical if you are unsure how much coverage you need.
Video-focused systems range from a single camera connected to a mobile app to a complete DIY surveillance setup with several cameras and a network video recorder. Some systems store clips locally on a memory card or recorder, while others use optional cloud storage. The right choice depends on how much footage you need to retain and whether you want to pay for an ongoing storage service.
Plan coverage before installing anything
Begin by walking around the property and identifying likely entry points, areas with poor visibility, and locations where an alert would be most useful. Typical priorities include the front door, back door, accessible windows, garage entrances, driveways, and pathways leading to the property.
A camera should provide a clear view without being blocked by furniture, plants, walls, or decorative items. Avoid pointing cameras directly at bright lights, since glare can reduce image quality. For wireless devices, test the connection at the intended mounting location before permanently attaching them. A weak Wi-Fi signal can cause delayed notifications, incomplete recordings, or unreliable live viewing.
Choosing cameras and recording options
Indoor cameras can be compact and simple to position, while outdoor models need housing designed for exposure to weather. If outdoor coverage is important, consider mounting flexibility, night visibility, motion detection zones, and the reliability of the wireless connection. Battery-powered cameras are convenient, but their placement and recording settings may need to be balanced against battery life.
Storage is another important decision. Local recording can help avoid recurring cloud charges and keeps footage within your property, but it may require a memory card, recorder, or other storage device. Cloud recording can make remote access easier, although available features and retention periods may depend on a subscription. If avoiding monthly fees is a priority, look for a system that supports local recording and useful app features without requiring a paid plan.
Installation tips for reliable results
- Place door and window sensors so the two parts align correctly when the opening is closed.
- Mount cameras high enough to reduce tampering, while keeping the important viewing area visible.
- Use motion zones to reduce alerts caused by traffic, pets, trees, or other routine movement.
- Label devices in the app so alerts clearly identify the affected room or entry point.
- Test alarms, notifications, live video, and recording after installation.
- Check batteries and connection status periodically rather than waiting for a device to fail.
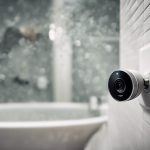
Discreet cameras may be appropriate for specific, lawful monitoring purposes, but they should not be used to record people where they reasonably expect privacy. Follow applicable laws and property rules, and inform household members or visitors when disclosure is required.
Budgeting for a home security setup
The total cost depends on the number of sensors, camera quality, storage method, power accessories, and whether professional help is needed. A small home security kit may cover one or two important entry points, while a larger system with several outdoor cameras and a recorder will cost more upfront.
When comparing systems, look beyond the initial purchase price. Include replacement batteries, extra mounting hardware, Wi-Fi equipment, storage devices, and any optional cloud or monitoring fees. A system that supports local storage and expandable components can offer useful flexibility for people who want to control long-term costs.
Build the system in stages
The most effective DIY setup is not necessarily the largest one. Start with the areas that matter most, confirm that the equipment works reliably, and expand only where coverage is lacking. With careful placement, appropriate storage, and regular testing, an easy-to-install system can provide practical alarm and video coverage without making home security unnecessarily complicated.